To use Share Factory Studio Bits Tags on PS5 choose a style and proceed to the Personalise screen. Set the starting position for the tag on the timeline, select Stickers, then Tags. Choose and position a tag with the right stick, adjust its duration and text, and then press the triangle to create the Bit.
Introduction
Tags can enhance your videos in various ways. This tutorial will guide you through using tags in the PS5 Share Factory Studio Bits Editor. You can create or add a separate Bits video to an existing project. Look out for upcoming tutorials on creating YouTube ‘Like’ and ‘Subscribe’ animations.
Step-by-Step Guide (Share Factory Studio Bits Tags)
Table of Contents
1. Open Share Factory Studio and Select Bits Editor
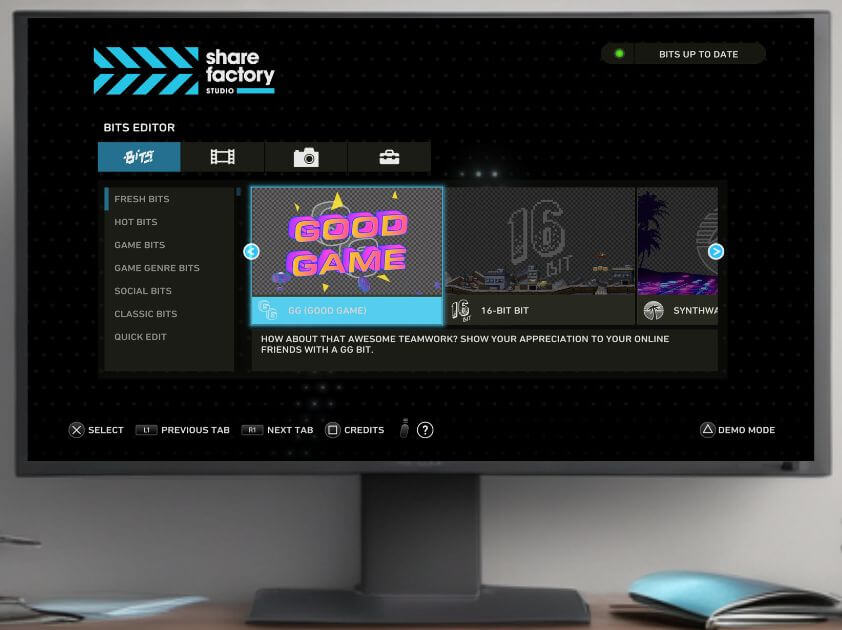
- Launch Share Factory Studio on your PS5.
- Navigate to the Bits Editor section, on the left-hand side of the main menu.
2. Choose Your Video Clip
- Scroll down Bits Types on the left-hand side
- Scroll to the right, and press X on any Bits style you like.
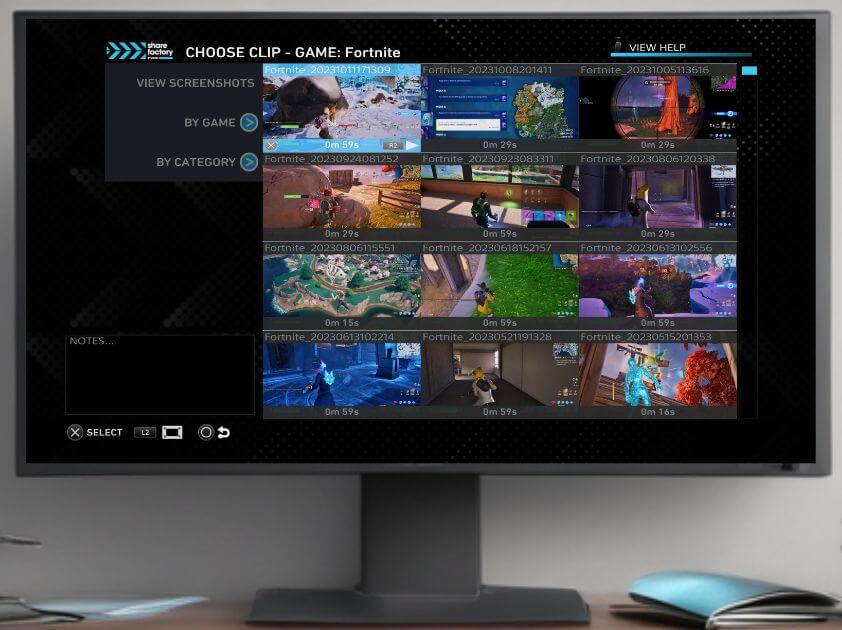
- Choose the video clip/screenshot you want to add tags to.
- Adjust the start and end points using the left and right sticks.
- Press the (X) button to confirm your selection.
3. Add Tags
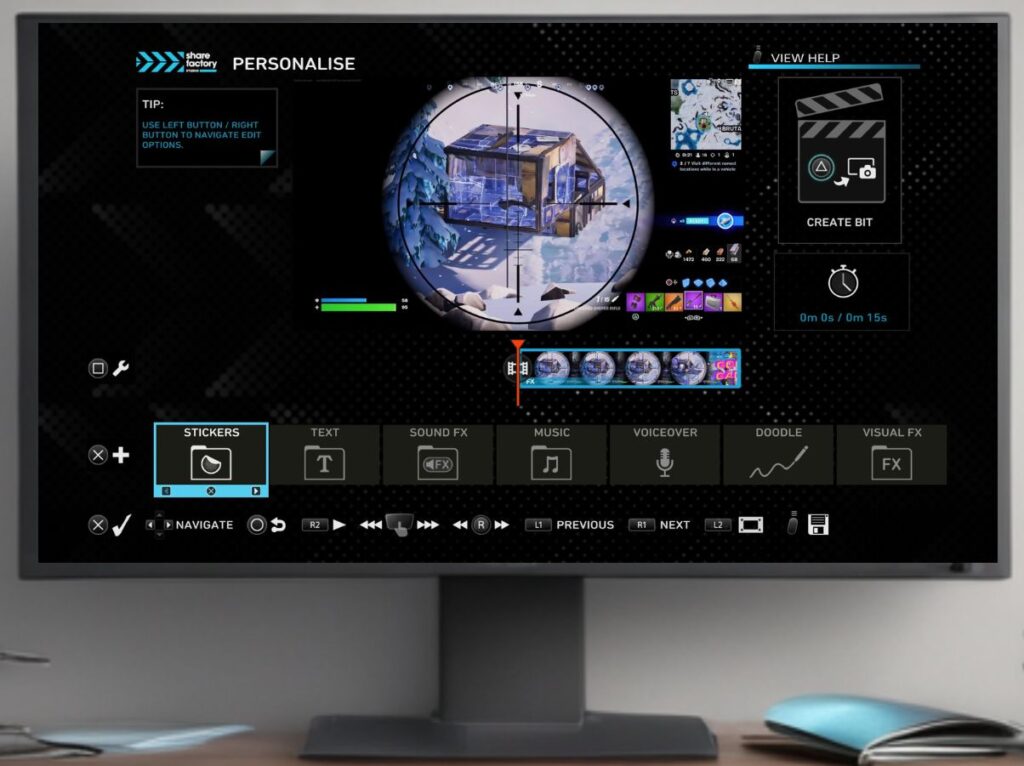
- On the Personalise screen, at the bottom, select Stickers.
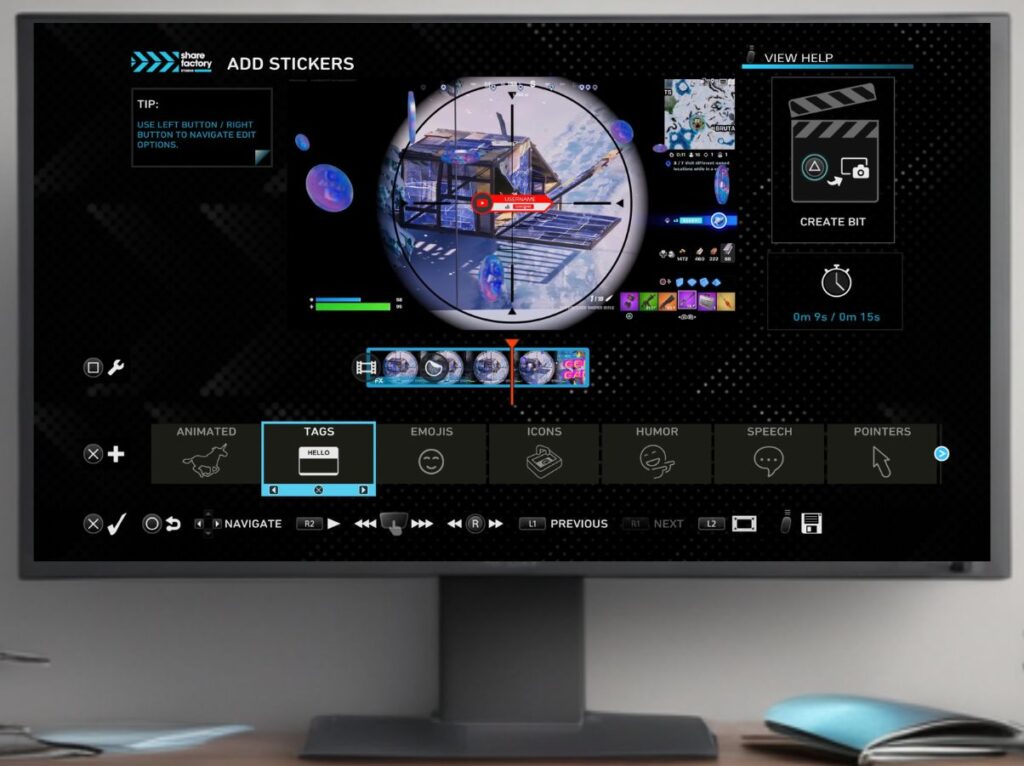
- Navigate to Tags and press X
- Choose a tag from the available options (YouTube, Twitter, etc.).
- Press the (X) button to select the desired tag.
4. Position Your Tag
- Use the right stick to move the tag to your desired location on the screen.
- Press the (X) button to confirm the tag’s position.
5. Adjust Tag Settings
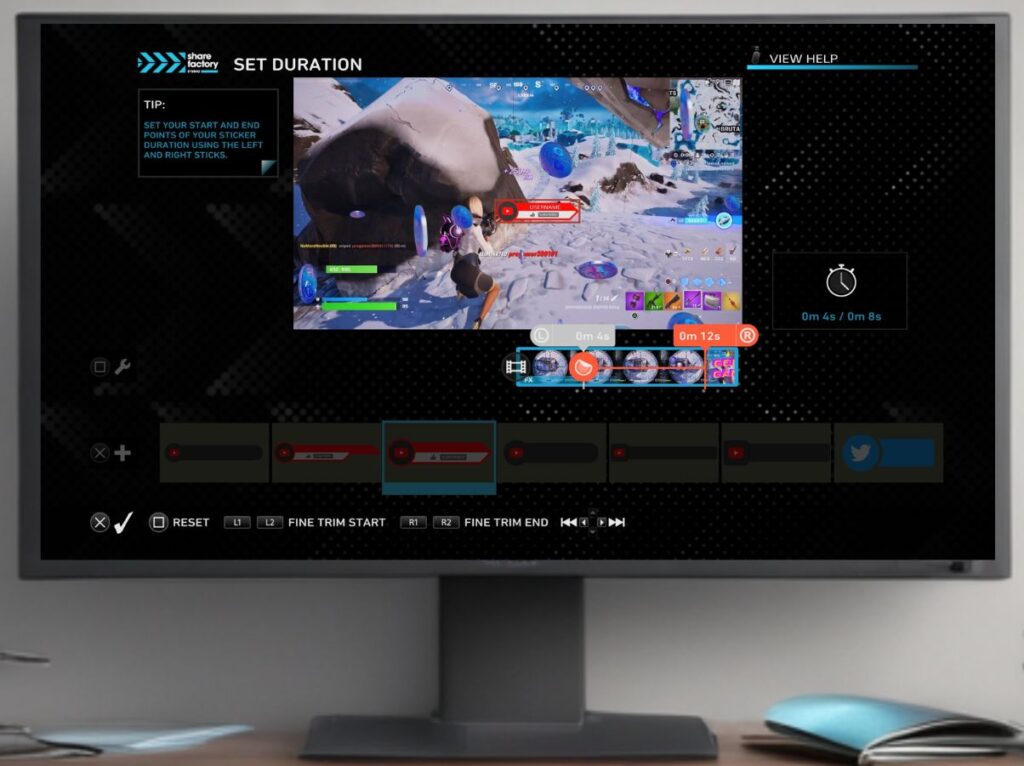
- Use the left and right sticks to set the start and end points of the tag’s appearance.
- Press the (X) button to confirm.
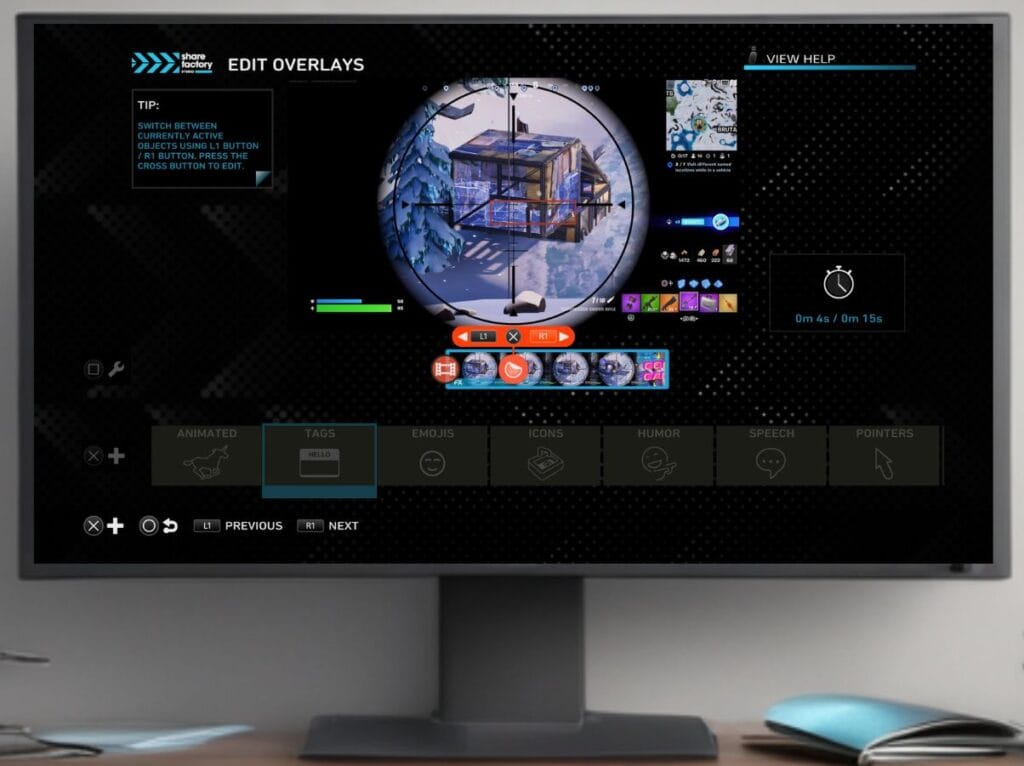
- On the next screen, press the (□) button and then (X) to access tag options: You may need to press L1 or R1 to find your tag if you have multiple tags or other edits on your video
- Transform: Move the tag around.
- Sticker Duration: Adjust the duration of the tag.
- Edit Text: Change the tag’s text (e.g., type in “NoMoreNoobie”).
- Delete Sticker: Remove the tag.
- Align: Align the tag left, right, or centre (optional).
6. Save and Review
- Press the (O) button to exit the options menu.
- Review your video to ensure the tag appears as desired.
7. Create and Save the Bits Video
- Press the (△) button to create the Bits video.
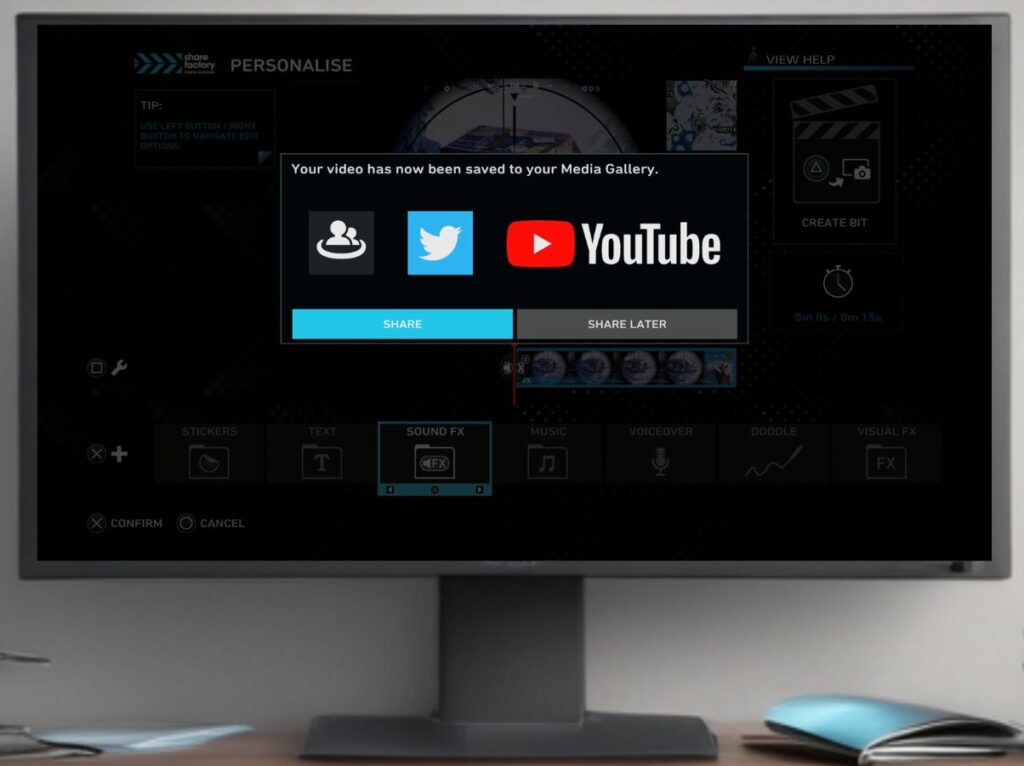
- 2 options here, choose: Share or Share Later:
- Share: Choose Share if you want to upload directly to YouTube or Twitter/X. Follow the shown steps from there or see this article to learn how to add your video directly to YouTube
- Share Later: Choose Share Later if you want to add your Bits video to another video project or if you just want to have it stored in your video gallery for showing others or general use in the future. To see how to add a Bits video to an existing Share Factory Video see this article for more details
8. Add Tags to an Existing Project
- Exit the Bits Editor by pressing the circle until you have the option to exit the Bits Editor.
- Go to the Video Editor.
- Select New Project or My Projects to add the tagged Bits video.
- For a new project, choose your video pack and add your clips.
- For an existing project, select your project, press the cross button (X), and choose Add Clip.
- Find the custom-tagged Bits video and press the square button (□) to add it.
9. Leave Share Factory Bits Editor
- To end a Bits Video session press (O) until you get the option to Exit the Bits Editor and press on Exit.
Summary
That’s it! You now know how to use Share Factory Studio Bits Tags on PS5. Check out our next video on creating YouTube subscribe animations. If you found this tutorial helpful, please like and subscribe. Thanks for watching!
