To learn how to create a Bits video using Share Factory Studio on PS5, select “Bits Editor” from the Main Menu. Choose a Bits Style, select your clip or screenshot, and edit the duration (where possible). Customize with stickers, text, voiceovers, etc. Press ‘Triangle’ to create the Bit. Use it as a solo video or add it to a new video project.
How to make a Share Factory Studio Bits Video on PS5
If you want to enhance your PS5 gameplay videos with personalized touches, Share Factory Studio’s new Bits feature is a game-changer. This guide will walk you through the steps to create your own Share Factory Bits video, offering tips and insights.
What is Share Factory Bits?
Share Factory Bits is a PS5 feature within the Share Factory Studio. It allows you to personalize and share your shorter gameplay video clips and screenshots with unique animations and effects. It’s a versatile tool for adding a creative flair to your gaming content.
Step-by-Step Guide to Creating a Share Factory Bits Video
1. Accessing Share Factory Bits
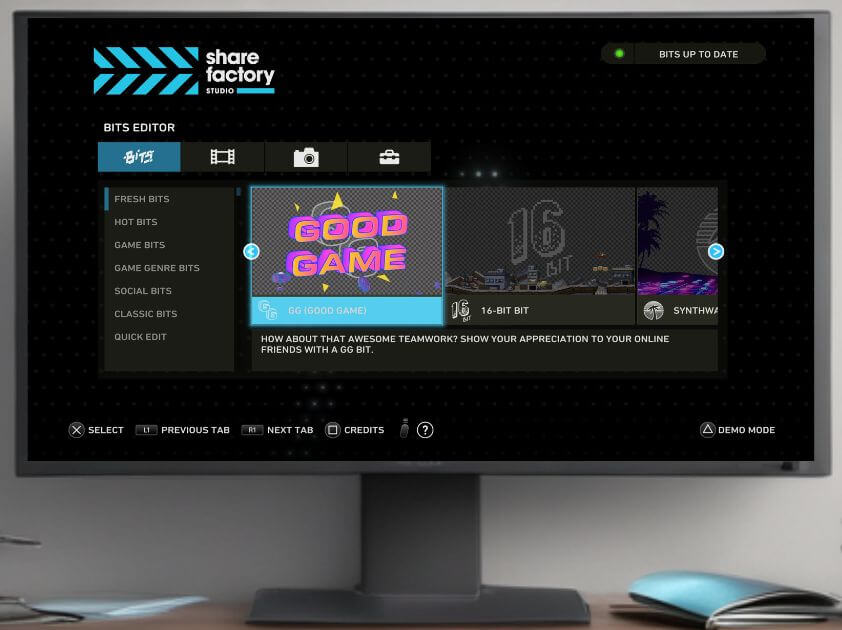
To get started, open Share Factory Studio on your PS5. In the top left corner, you’ll see the “Bits Editor” section. Scrolling down the left-hand-side you will find the below categories:
Bits Type | Bits Type details |
Fresh Bits | These are the newest Bits added to the Share Factory Bits Editor (Examples Scary Bit, Birthday, Coffin Dancers) |
Hot Bits | The favourite Bits types as decided by the community (Examples: Oh No Laugh, Playstation Style) |
Game Bits | Bits styles from games (at time of writing only FIFA 23 was listed) |
Game Genre Bits | The favourite game genre styles – Currently CARTOON, FOOTBALL, BASEBALL, STREET RACING, SHOOTER:CCTV, SHOOTER: ALIEN ENCOUNTER, SHOOTER: SKETCH STYLE, CLASSIC ARCADE and OLD SCHOOL RPG |
Social Bits | These are the social media styles covering YouTube, Twitter and Playstation |
Classic Bits | These are the classic Bits that have been around for a while but still popular (Examples GG Good Game, Racing, Celebration, The End) |
Quick Edit | 2 Options in this section. Option 1 is ‘Custom Bit’ where you can make a video without any styles lasting up to one minute in length and Option 2 is ‘Rebound’ which uses a 3 second clip, plays it through and then reverses it back. This becomes a 6 second rebound clip. |
2. Selecting Your Bit Animation
- Choose an Animation: Browse through the available Bits animations and select one by pressing the X button.
- Add Your Video or Screenshot: Choose a video clip or screenshot from your gameplay recordings. (Note that you can only use one media file at a time.)
3. Editing Your Clip
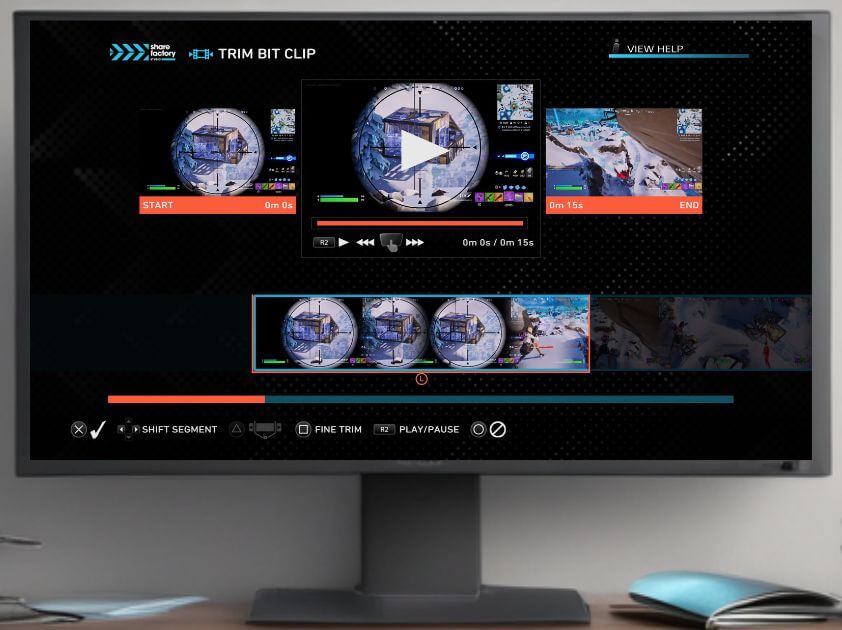
Once you’ve chosen your video or screenshot:
- Set Clip Duration: Use the left stick and right stick on your controller to adjust the start and end points of your clip. (Most Bits animations have a set duration, typically around 15 seconds, but some allow you to change the duration).
- Clip selection: You can also choose which part of the clip you are using if the clip is longer than the Bit style. (Note that you can press Triangle to set the clip duration so it stays the same while moving to find the correct part of the clip to use) Also, you can use Square to make ‘Fine Trim’ of the clip if needed.
- Preview: Press R2 on your Controller to preview how your clip looks with the selected animation. Press X to confirm
4. Adding Stickers and Text
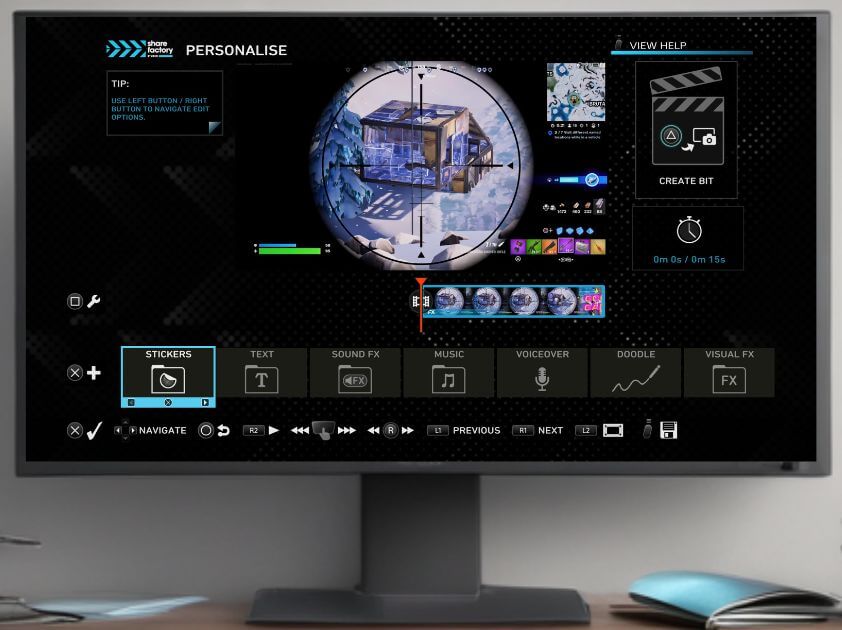
- Stickers: Navigate to the stickers section and press the cross button to choose from various animated stickers. You can resize, rotate, and position them as desired.
- Text: Add text by selecting a font and typing your message. You can transform, resize, and colour the text to match your video’s theme.
5. Using Additional Effects
- Sound Effects: Add sound effects from the Share Factory Studio library to enhance your video. These are categorized as ‘Voices’ and ‘Special’. LINK This article will show you more about adding Sound FX to your Bits video.
- Doodles: Experiment with doodles for a more personalized touch. Note that doodles might require some practice, so consider watching a dedicated tutorial. LINK This article will show you more about adding Doodles to your Bits video.
- Visual Effects: Add ‘Filters’ and ‘Camera’ effects like pulse or focus to add dynamic visual elements. You can modify the intensity and duration to fit your needs.
6. Finalizing Your Bits Video
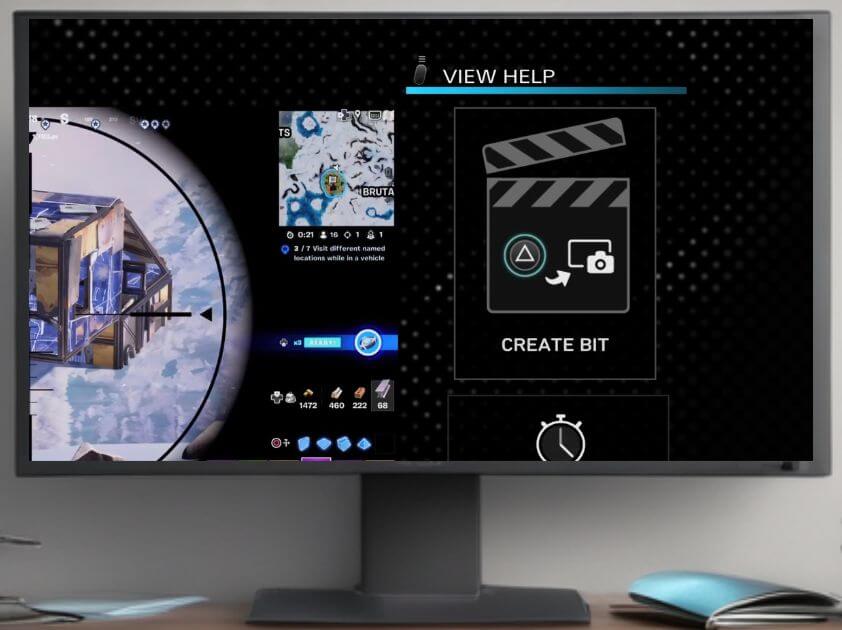
- Review: Once you’ve added all desired elements, review your video again by pressing the touchpad button on your controller to ensure everything is perfect.
- Export: You need to complete your Bits video in one session, as you can’t save and return to it later. Export your video by pressing Triangle to “Create Bit”
7. Sharing and Further Editing
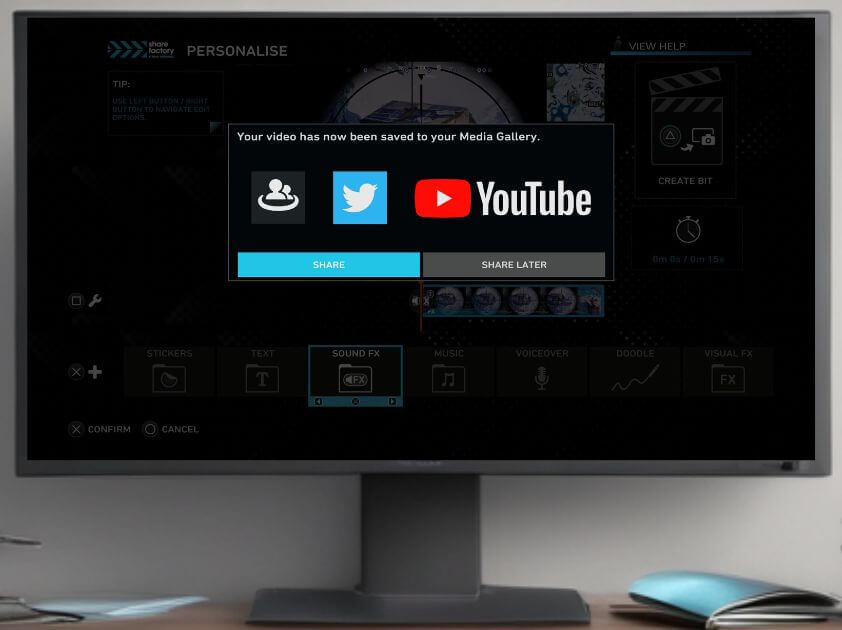
- Share: After exporting, you can ‘Share’ your video directly to YouTube, Twitter or Messages or ‘Share Later’ if you don’t want to share it now or at all. It will be sat in ‘My Gallery’ on the main menu for future use.
- Further Editing (New Project): If you want to use your Bits video in a ‘new‘ video project:
- Go to the Share Factory Studio menu.
- Select the’ video editor’ and click on New Project below to create a new project.
- Choose any Creator Pack
- Choose Most Recent on the left-hand menu, move on to your exported clip, press X and then Square to add your exported Bits video to the project.
- Edit the project how you would like and then you can choose ‘Share’ to export it to YouTube, Twitter or messages as preferred or choose ‘Share later’.
Tips for a Smooth Bits Editing Experience
- Navigating Editing options: When editing in Bits there is a lot of help around the outside of the screen stating what buttons to press to achieve specific tasks so learn these as it will help. Generally, X adds or confirms something, Square amends something, and Circle goes back a step.
- Working with Text: Text is a versatile tool you’ll likely use often. Practice adding and transforming text to become proficient. You can rotate, amend size, align, and reposition text on the screen.
- Single Session Editing: Remember, you must finish your Bits video in one sitting, so plan your session accordingly.
By following these steps, you’ll be able to create engaging and personalized Share Factory Bits videos that stand out. Explore the different features and have fun experimenting with your creativity!
Watch Next
For a detailed tutorial on using Share Factory Bits voiceovers, check out the next video in this series. If you found this guide helpful, please like and subscribe. Use the support creator code “NoMoreNewbie” and thank you for watching!
