

Learn how to add music on Sharefactory PS4 with this step-by-step guide. Discover how to insert, adjust, and customize built-in tracks, as well as import your music. Enhance your gaming videos easily with fade-in effects, volume controls, clone tracks and more.
Adding music in Sharefactory on PS4 is simple and enhances your gaming videos. First, install the app and open your project. Use the Add Music option to select from 20 built-in tracks. Adjust the volume, fade-in/out effects, and trim or clone the music as needed. You can also import custom tracks via USB. Preview your video and tweak audio levels before saving to ensure the best results.
Table of Contents
Step 1: Open Your Video Project
- Launch Sharefactory on your PS4.
- Open an existing video project or create a new one.
- Navigate to the point in your video where you want to add music.
Step 2: Adding Music to Your Video
- Press the (X) button on your controller.
- Select Add Music from the menu.
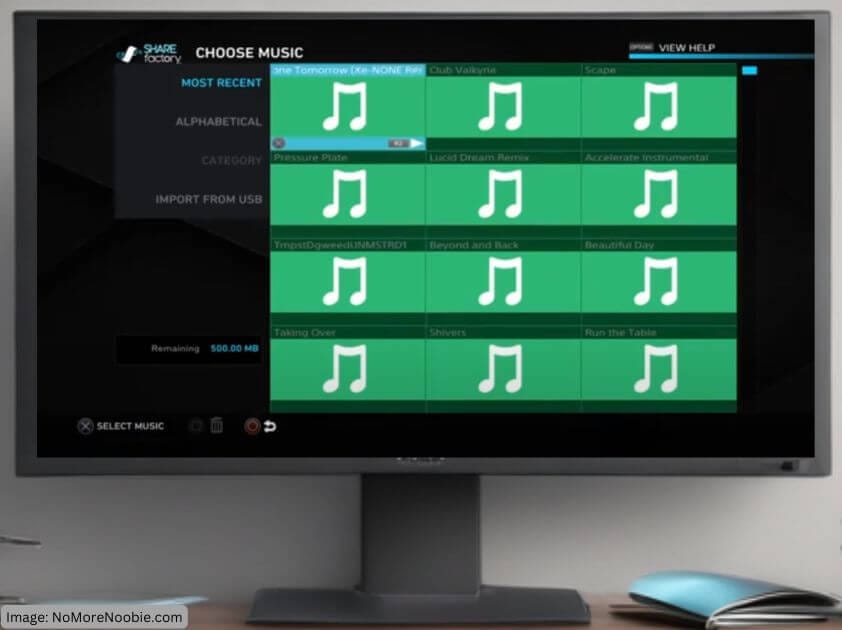
- A list of 20 built-in music tracks will appear, featuring various styles and durations.
- Use R2 to preview the available tracks.
- Once you’ve chosen a track, press X to add it to your project.
Your chosen music track will now be on your video project.
Step 3: Adjusting Your Music
After adding your selected music track, you can customize it to match your video:
Press Square to open the edit music menu:
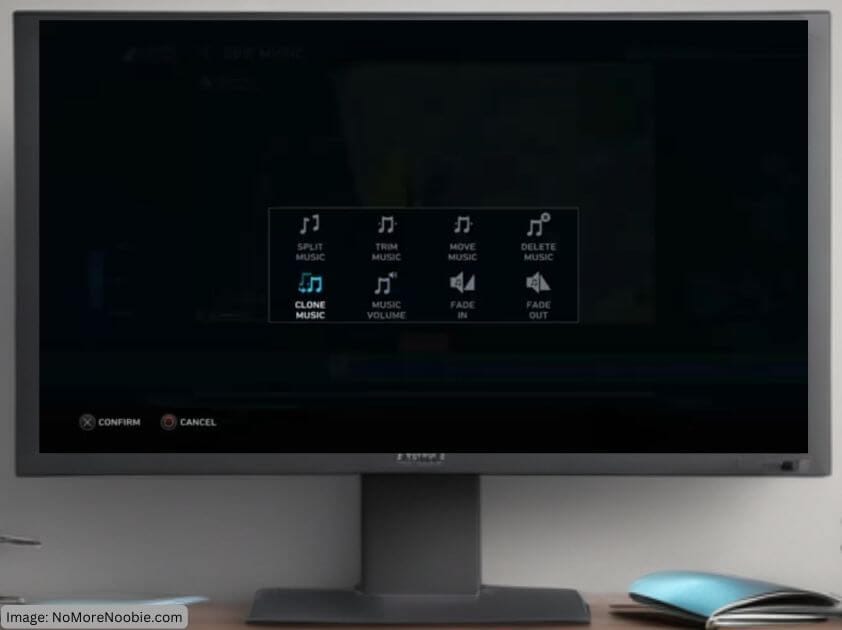
- Move the Music: Select Move to position the music at the right moment in your video. (Tip have the timeline at the beginning of the music track so as you move it you can see what video frame you are on when you confirm it)
- Fade In and Fade Out: Select the fade-in/fade-out option and adjust the duration (up to 5 seconds) for a smoother transition.
- Change Volume: Adjust the music volume so it doesn’t overpower your voiceover or game sounds. (you can use ‘Prioritise’ to prioritise the music track volume over the gameplay and track 2 volume by ticking the prioritise button in volume setting)
- Split the Music: Press X to split the track at a specific point and delete any unwanted sections if you don’t want to use the whole music track.
- Clone Music: If you want the same track to play again, select Clone to duplicate it.
Step 4: Preview and Final Adjustments
Before finalizing your video, play it back to ensure the music complements your gameplay. Adjust the audio levels as needed to create a balanced mix between gameplay sounds, commentary, and background music.
Bonus Tip: Adding Custom Music
While Sharefactory’s built-in music options are limited, you can import your own music using a USB drive. Simply create a folder on your USB drive called SHAREFACTORY. Within that folder create a new folder called MUSIC.
Save your MP3 files to the MUSIC folder on your USB, then insert it into your PS4, and select Import Music in Sharefactory. Once imported you can add it to your video project following the same steps as above.
Next Steps
If you’re looking for more ways to enhance your gaming videos, check out these guides:
- How to Add Text and Effects in Sharefactory
- Best Microphones for Gaming Commentary (Affiliate Link)
- How to Improve Video Quality on Sharefactory
Final Thoughts
Adding music to your Sharefactory videos is a great way to make them more engaging. With just a few simple steps, you can customize your audio to fit the mood of your gameplay. If you found this guide helpful, consider subscribing to my YouTube channel for more Sharefactory tips, and check out my website for in-depth tutorials!