Discover how to use Share Factory Studio Bits Doodles on PS5. Select a Bits style, go to the Personalize screen, choose “Doodle,” and draw using the right stick or touchpad. Customize with colour, opacity, and line thickness. Use the eraser tool as needed. Save and share your masterpiece effortlessly.
How to Use Doodles in Share Factory Studio Tutorial Bits Editor on PS5
Welcome! This tutorial will explore how to use doodles in the PS5 Share Factory Studio Studio Bits Editor. This guide will cover everything you need to know, including some tips and features you might not know. Let’s get started!
Table of Contents
Step 1: Choose Your Bit
- Open the Share Factory Studio Bits Editor from the main menu.
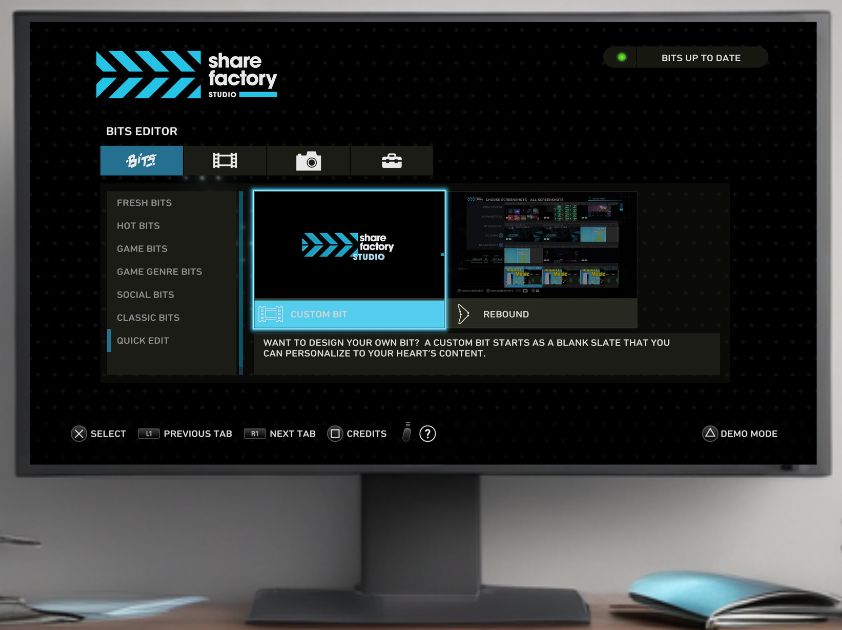
- Select the Bit style you want to use. For this tutorial, we’ll select “Custom Bits.”
- Choose the video/screenshot clip for your project.
- Adjust the start and end points using the left and right sticks, then press the cross button to confirm.
Step 2: Open Doodles Menu
- After selecting your clip, use the R Stick to move the clip timeline along to where you want your doodle to be.
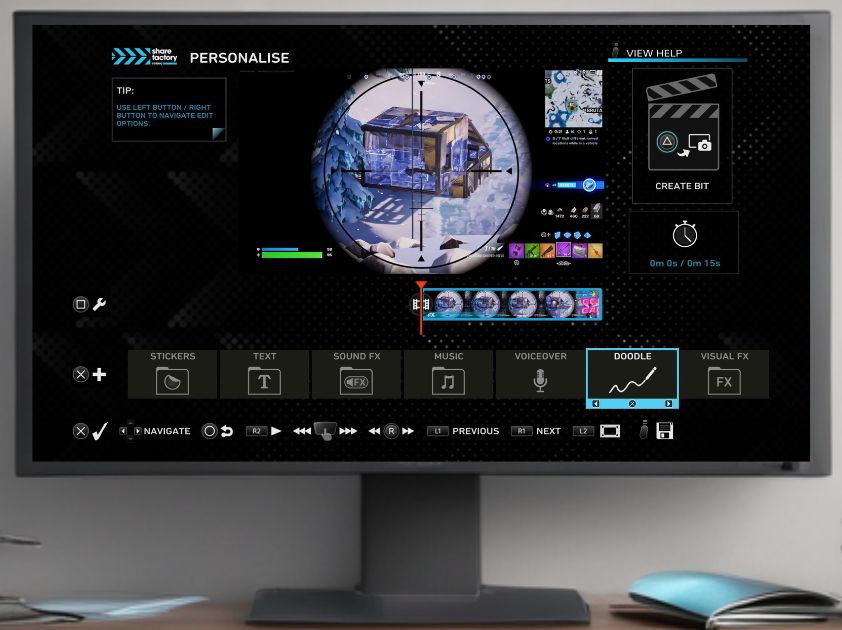
- You’ll see various options at the bottom of the screen. Choose “Doodle.
- The doodling interface will open, displaying 10 different colours you can use.
Step 3: Create Your Doodle
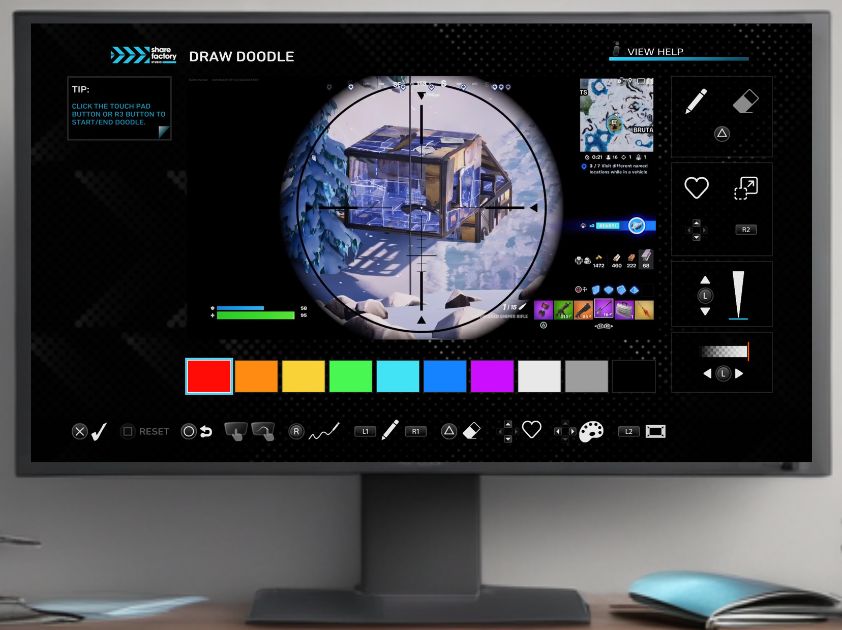
- Choose colour – Use the D-Pad to move left and right over to the colour you want to draw from the options at the bottom.
- Choose Brush type from 7 options using L1 & R1
- Choose Shapes from 10 options using D-Pad up & down (For Freestyle drawing choose the wiggly line)
- Choose Line/Shape thickness using the L Stick (moving up & down)
- Choose Opacity using the L stick (moving left and right)
- Use the R stick or the touchpad (I find the R Stick easiest) to draw. Tap to start drawing, draw your creation, and tap again to stop. You can draw freeform lines, and shapes, or use preset shapes like arrows and triangles.
Step 4: Adjust Doodle Settings
- Press the (△) button to switch between drawing and erasing.
- To delete your last doodle, press the square button. If deleting lots of doodles keep pressing square
- For shapes, you can maintain the exact shape (just change size) by pressing R2 to lock it in. Without that lock the shape will change to narrower, wider etc as you adjust it.
Step 5: Use Different Doodle Styles
- Draw a line or shape, then use the L1 and R1 buttons to cycle through different styles (e.g., chalk, spray).
- Adjust the opacity of your doodle by moving the left stick left or right.
Step 6: Set Doodle Duration
- Return to the main doodle screen by pressing X
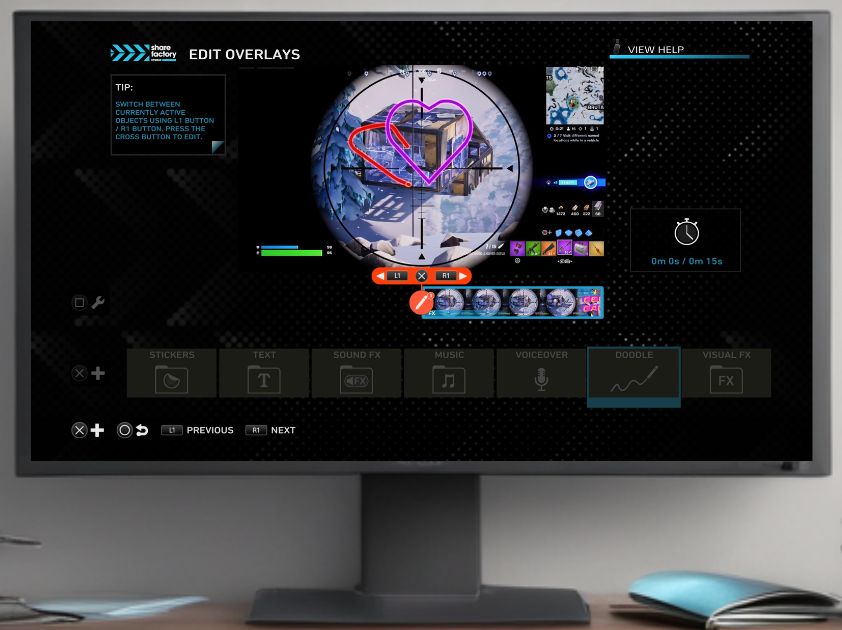
- Move the timeline over the Pencil icon, press the square button to edit the doodle duration, delete the doodle, or edit the doodle. (if you have multiple doodles then use R1 and L1 to scroll between them)
- Select “Change Duration” and use the left and right sticks to adjust how long your doodle appears in the video.
Step 7: Use the Eraser Tool
- Press the (△) button to switch to the eraser.
- Choose between erasing lines or freeform erasing by selecting the mode.
Step 8: Set Doodle Area
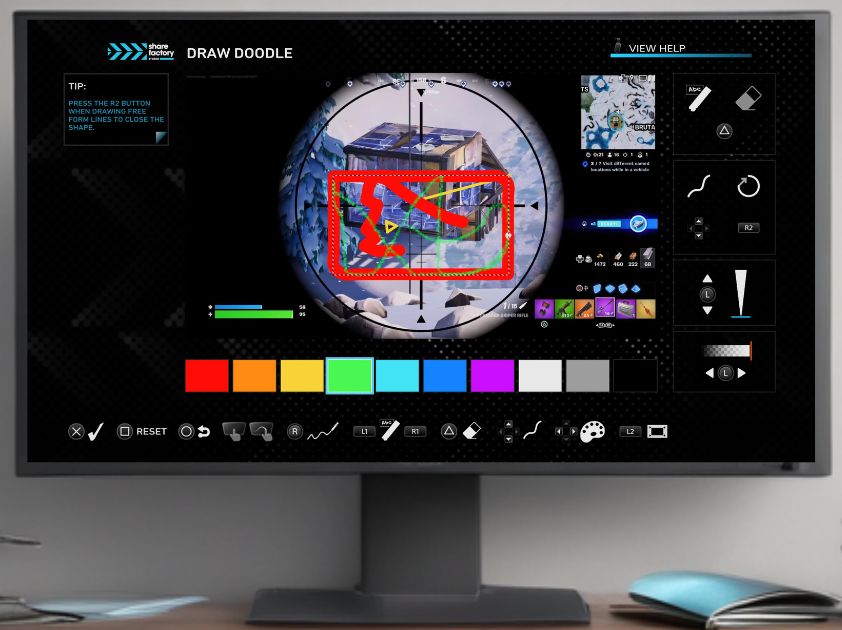
- Use two fingers on the touchpad to create a box on the screen.
- Adjust the size and position of the box, then tap down on the touchpad to confirm. This restricts doodling to within the box.
Step 9: Finalize Your Doodle
- Once you’re happy with your doodle, press the X button to save it.
- Leave the doodles screen and complete any other edits you want to do.
Step 10. Create and Save the Bits Video
- Press the (△) button to create the Bits video.
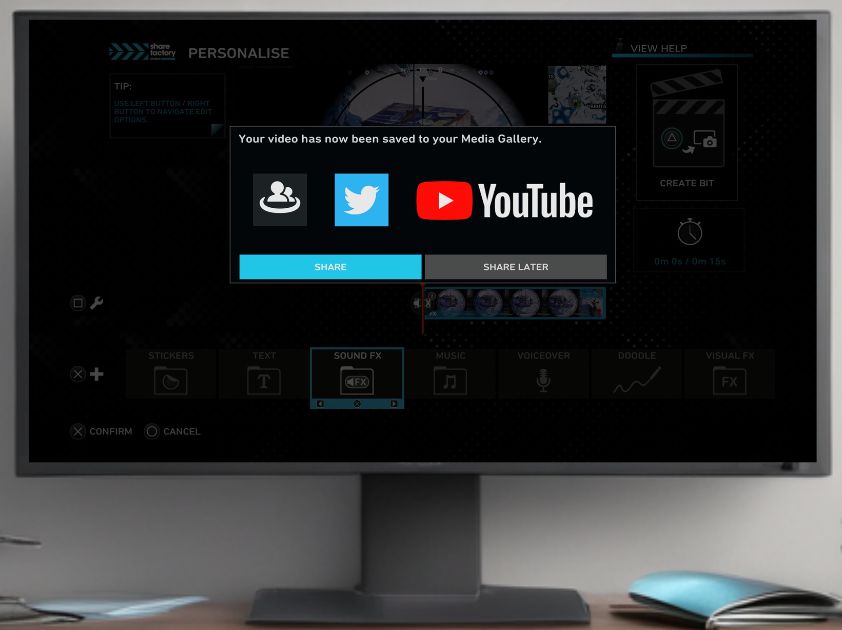
- 2 options here, choose: Share or Share Later:
- Share: Choose Share if you want to upload to YouTube or Twitter/X. Follow the shown steps from there or see this article to learn how to add your video directly to YouTube
- Share Later: Choose Share Later if you want to add your Bits video to another video project or if you want to have it stored in your video gallery for showing others or general use in the future. To see how to add a Bits video to an existing Share Factory Video see this article for more details
Further Editing (New Project): If you want to use your Bits video in a ‘new‘ video project:
- Go to the Share Factory Studio menu.
- Select the’ video editor’ and click on New Project below to create a new project.
- Choose any Creator Pack
- Choose Most Recent on the left-hand menu, move on to your exported clip, press X and then Square to add your exported Bits video to the project.
- Edit the project how you would like and then you can choose ‘Share’ to export it to YouTube, Twitter or messages as preferred or choose ‘Share later’.
