

Learn how to import music to Sharefactory on PS5 using a USB and PC. This step-by-step guide covers formatting your USB, finding copyright-free music, and troubleshooting import issues. Enhance your gaming videos with custom tracks and take your edits to the next level!
Importing music to Sharefactory Studio on PS5 is simple with a USB and a PC. First, format your USB to exFAT, create the correct folder structure, and add compatible audio files. Then, import them into Sharefactory through the toolbox or directly from your project. This guide also covers troubleshooting and free music sources like YouTube Audio Library. Let’s look at this further.
How to Import Music to Sharefactory on PS5 (Using PC and USB)
Adding custom music to your Sharefactory projects on PS5 allows you to enhance your videos with the perfect soundtrack. While Sharefactory includes around 120 built-in songs, importing your own music requires a USB and a PC. Follow this guide to learn the best methods for importing music, finding copyright-free tracks, and troubleshooting common issues.
Table of Contents
Initial check of USB
Before adding music, your USB stick needs to be formatted correctly. (It might already be formatted correctly so no need to reformat, so move on to Step 1 if that’s the case) If you go through steps 1 to 5 first and it doesn’t work then you could complete the below to reformat the USB stick. The retry the Steps 1-5.
- Insert the USB into your PC or laptop.
- Format the USB to exFAT (this deletes all data, so back up important files first):
- Right-click the USB in File Explorer (Windows) or Finder (Mac).
- Select Format and choose exFAT as the file system.
- Click Start to complete the formatting.
Step 1: Create the Required Folders
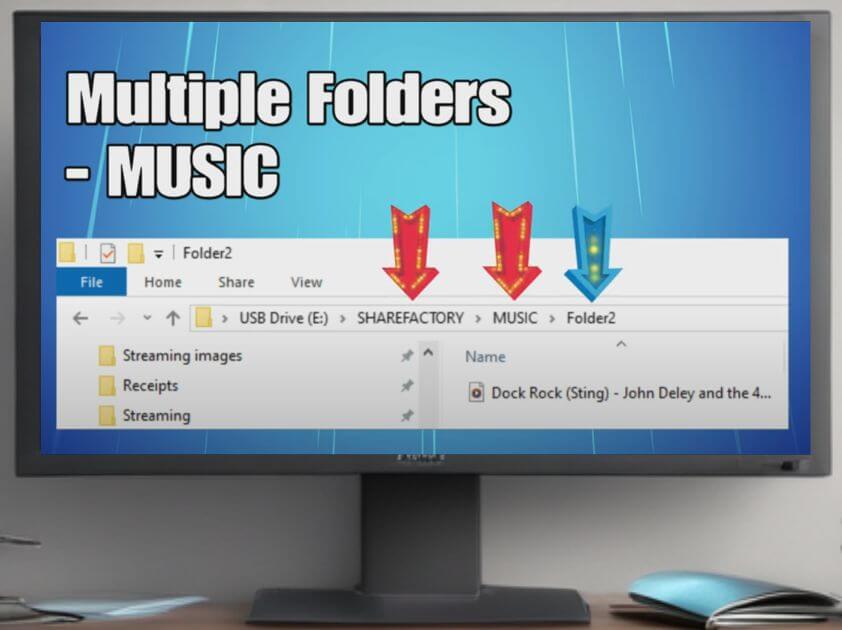
Sharefactory requires a specific folder structure:
- Open the USB drive and create a new folder named Sharefactory.
- Inside the Sharefactory folder, create another folder named Music.
- (Optional) Create subfolders within the Music folder to organize tracks (for example Folder 1, Folder 2 etc.)
Step 2: Add Music to Your USB
Now, move your preferred music tracks from your PC into the Music folder on the USB stick.
If you don’t already have music tracks on your PC keep reading as you can find copyright-free music on the internet I have some suggestions below, but do always check that any music you do use is copyright-free.
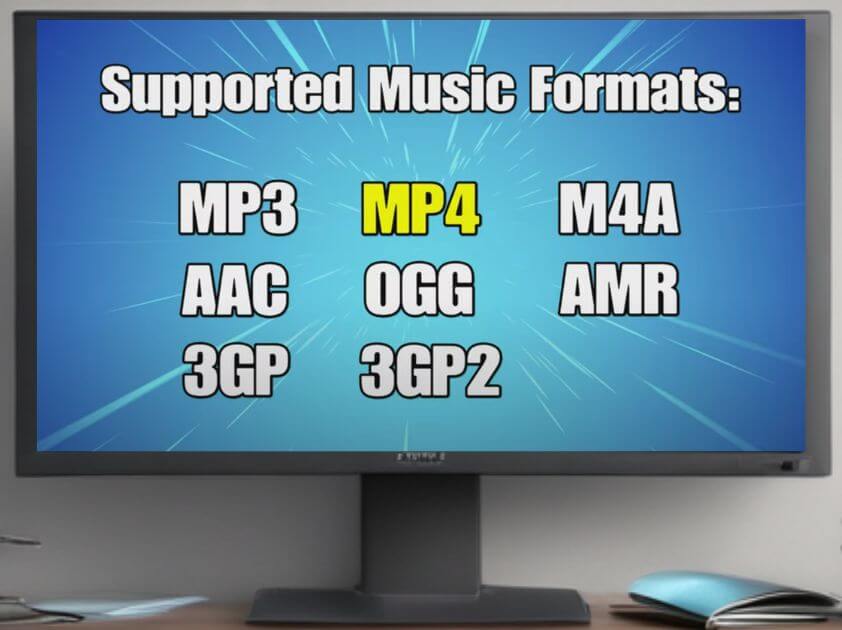
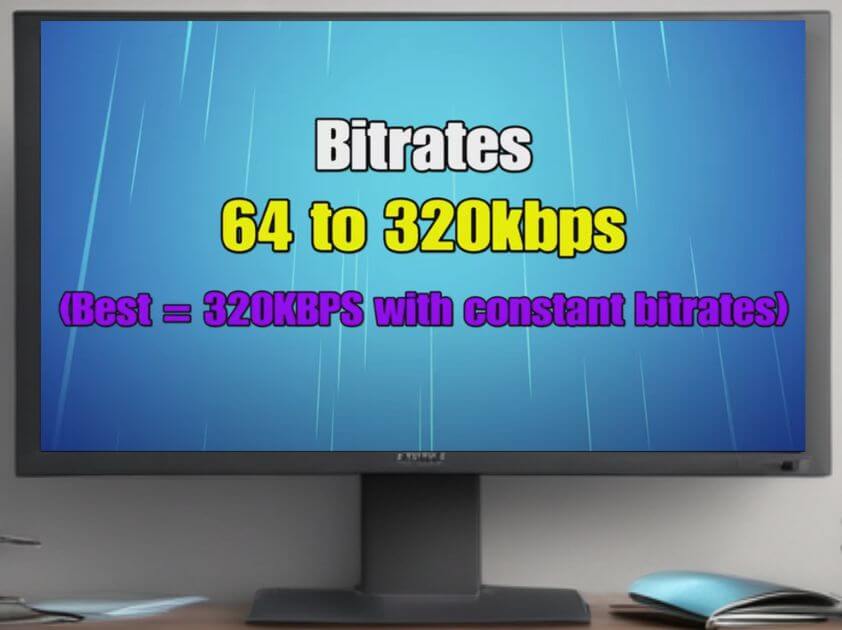
Sharefactory supports all the formats below (mainly MP3 and WAV formats) with specific bit rates see image below too.. Ensure your audio files are compatible before transferring them.
Sharefactory Studio PS5 File formats:
Sharefactory Studio PS5 Bitrates:
Finding Copyright-Free Music
To avoid copyright claims, perhaps consider music from these sources (do check the copyright situation yourself with each one before using as they may change):
- YouTube Audio Library – Free, royalty-free tracks.
- NoCopyrightSounds (NCS) – Popular for gaming content.
- Epidemic Sound – Premium subscription-based music for content creators.
Remember: Sharefactory Studio on PS5 already has around 120 music tracks that you can use ready to use in sharefactory studio.
👉 Consider using high-quality USB sticks for faster transfer speeds. Check recommended USB drives here. (Affiliate link)
Step 3: Import Music to Sharefactory on PS5
Method 1: Using the Toolbox
- Insert the USB into your PS5.
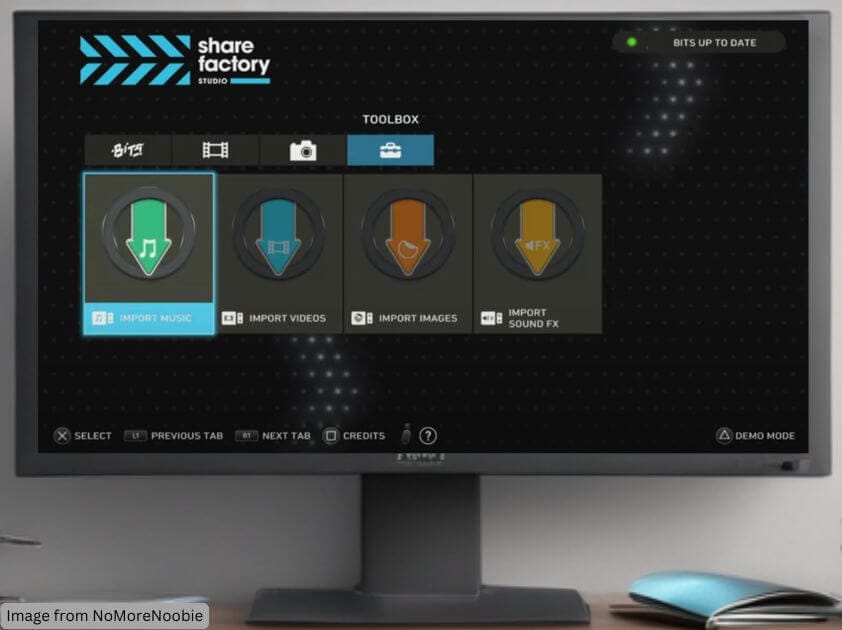
- Open Sharefactory Studio and navigate to Toolbox > Import Music.
- Select Import from USB.
- Choose the track(s) by pressing X and then press Square to import.
- Go back to main screen and open your video project
- Select the timeline location where you want to add music.
Note: If you chose this method go to Step 4
Method 2: Importing Directly from a Project
- Open your project in Sharefactory Studio.
- Select the timeline location where you want the beginning of the music to start.
- Press X > Add Music > Import from USB.
- Select your track and press X to import it.
Step 4: Edit Your Music in Sharefactory
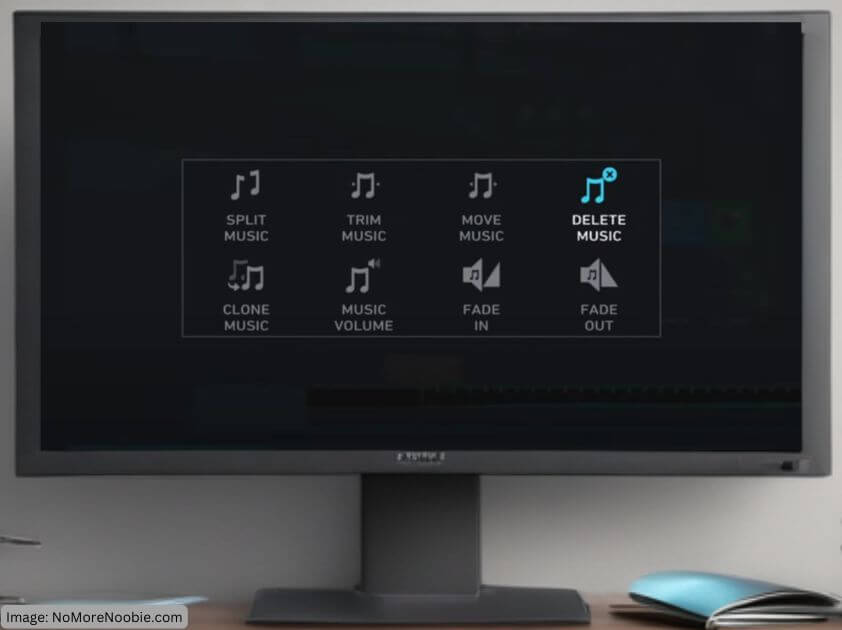
Once imported, you can edit the music. While on the music track press the Square button to see editing options:
- Trim the track to remove unwanted sections.
- Split the track into separate clips
- Move the track to different positions on the timeline.
- Delete music track
- Adjust Volume or apply to all tracks.
- Fade In/Fade Out for smooth transitions.
- Clone Music to duplicate clips easily.
Step 5: Finish editing the rest of your project
Check the volume levels of the music, gameplay, and Track 2 if you have them to ensure that you are happy that they all work together. Save your project and keep it to show others or upload it to social media if that’s your intention…
Troubleshooting Import Issues
If your music doesn’t appear in Sharefactory, check:
- USB is formatted as exFAT – NTFS or FAT32 won’t work.
- Correct Folder Names – Ensure files are inside
USB > Sharefactory > Music. - Audio Format – MP3 or WAV with supported bit rates (see rates mentioned above)
Final Thoughts
So that’s how to import music to sharefactory on PS5 and is a great way to personalize your gaming videos. By following this guide, you can ensure smooth imports and avoid common issues. Looking for more Sharefactory tips? Check out our guide on Adding Sound Effects in Sharefactory!
👉 Need a reliable USB for Sharefactory? See our top picks here. (Affiliate link)